本記事では、Matching in GAN-Spaceと呼ばれる機械学習手法を用いて、顔写真の属性編集、2写真の中間画像を生成する方法をご紹介します。
Matching in GAN-Space
概要
Matching in GAN-Spaceは2021年3月に論文発表されたGANに関する新しいマッチングアプローチ手法です。
ベンチマークデータセットの属性間の有意な相関関係により、アルゴリズムバイアスはデータセットバイアスに多大な影響を受けます。
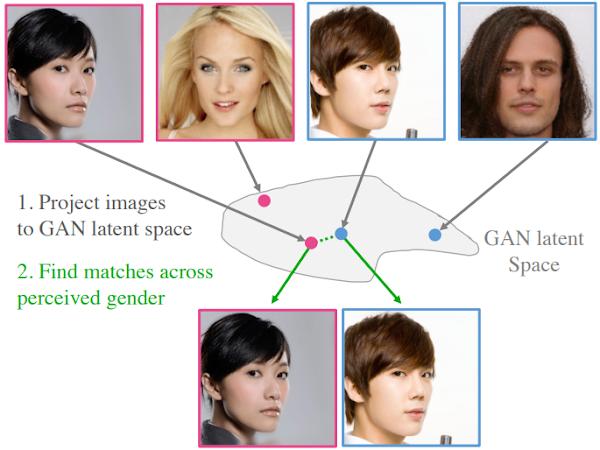
本手法では、最初にセマンティック属性を保持し、生成的敵対的ネットワーク(GAN)の潜在空間に実像を投影します。その後、保持したセマンティック属性を用いて潜在空間から意味属性と知覚属性のバランスが取れた画像を探索しデータセットを生成します。
詳細はこちらの論文をご参照ください。
本記事では、上記手法を用いて、顔写真の年齢、肌色、髪の長さ、性別の属性を変更する方法と2つの顔写真の中間画像を生成する方法をご紹介します。
デモ(Colaboratory)
それでは、実際に動かしながらMatching in
GAN-Spaceを用いた顔写真の属性編集を行っていきます。
ソースコードは本記事にも記載していますが、下記のGitHubでも取得可能です。
GitHub - Colaboratory demo
また、下記から直接Google Colaboratoryで開くこともできます。

なお、このデモはPythonで実装しています。
Pythonの実装に不安がある方、Pythonを使った機械学習について詳しく勉強したい方は、以下の書籍やオンライン講座などがおすすめです。
環境セットアップ
それではセットアップしていきます。
Colaboratoryを開いたら下記を設定しGPUを使用するようにしてください。
「ランタイムのタイプを変更」→「ハードウェアアクセラレータ」をGPUに変更
まず、論文発表元のGitHubからソースコードを取得します。
%cd /content

!git clone https://github.com/csinva/matching-with-gans.git

# for align face
%cd /content
!git clone https://github.com/adamian98/pulse.git
次にライブラリをインストールします。
# Tensorflow1.x系を使用
!pip uninstall tensorflow -y
!pip install tensorflow-gpu==1.15.4

!pip install scikit-learn==0.21.3 # use this version to unpickle ridge model
最後にライブラリをインポートします。
%tensorflow_version 1.x
import tensorflow as tf
import sys
import matplotlib.image as mpimage
import matplotlib.pyplot as plt
import os
from os.path import join
from PIL import Image
sys.path.append('matching-with-gans')
import util
from google.colab import files
以上で、環境セットアップは完了です。
テスト画像のセットアップ
次に、顔写真を2枚アップロードします。
%cd /content/matching-with-gans
!rm -rf upload
!mkdir -p upload
%cd upload

temp = files.upload()
temp = list(temp.keys())
temp = temp[0]

img1_path = os.path.join("/content/matching-with-gans/upload", temp)
img1_filename = os.path.basename(img1_path)
img1_wo_ext = img1_filename.split(".")[0]
print("upload img1 file here:", img1_path)

temp = files.upload()
temp = list(temp.keys())
temp = temp[0]

img2_path = os.path.join("/content/matching-with-gans/upload", temp)
img2_filename = os.path.basename(img2_path)
img2_wo_ext = img2_filename.split(".")[0]
print("upload img2 file here:", img2_path)
本記事では、Pixabay様の下記2画像を使用させていただきます。
1枚目
2枚目
作業ディレクトリ定義
属性編集の前に作業ディレクトリを作成しておきます。
%cd /content/matching-with-gans
!rm -rf outputs
!mkdir -p outputs
%cd outputs
!mkdir aligned projected manipulated

RAW_IMAGES_DIR = "/content/matching-with-gans/upload"

ALIGNED_IMAGES_DIR = "/content/matching-with-gans/outputs/aligned"
PROJECTED_IMAGES_DIR = "/content/matching-with-gans/outputs/projected"
MANIPULATED_IMAGES_DIR = "/content/matching-with-gans/outputs/manipulated"
INTERPOLATED_IMAGES_DIR = "/content/matching-with-gans/outputs/interpolated"
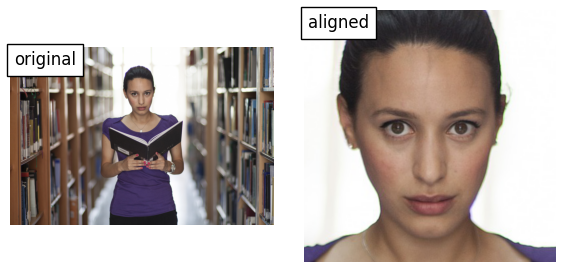
Align the images
まず、写真から顔の部分を切り出します。
# %cd /content/matching-with-gans

# !python ./projection_manipulation/scripts/00_align_images.py  {RAW_IMAGES_DIR} {ALIGNED_IMAGES_DIR}

%cd /content/pulse
!python align_face.py \
  -input_dir {RAW_IMAGES_DIR} \
  -output_dir {ALIGNED_IMAGES_DIR} \
  -output_size 1024 \
  -seed 12 \

im_raw = mpimage.imread(join(RAW_IMAGES_DIR, img1_filename))
im_aligned = mpimage.imread(join(ALIGNED_IMAGES_DIR, img1_wo_ext+"_01.png"))
util.plot_row([im_raw, im_aligned], annot_list=['original', 'aligned'])
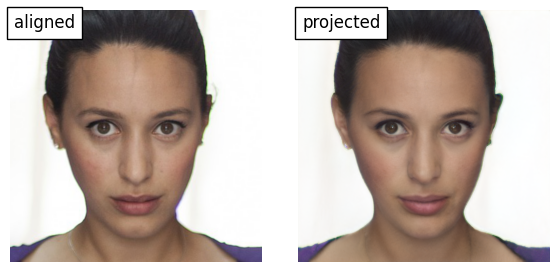
GAN潜在空間に投影
入力画像をGANの潜在空間に投影します。
%cd /content/matching-with-gans

!python ./projection_manipulation/scripts/01_project_images.py  {ALIGNED_IMAGES_DIR} {PROJECTED_IMAGES_DIR}

im_aligned = mpimage.imread(join(ALIGNED_IMAGES_DIR, img1_wo_ext+"_01.png"))
im_projected = mpimage.imread(join(PROJECTED_IMAGES_DIR, img1_wo_ext+"_01.png"))
util.plot_row([im_aligned, im_projected], annot_list=['aligned', 'projected'])
projectedが潜在空間に投影された画像です。こちらを編集していきます。
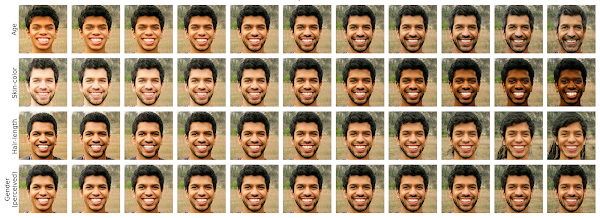
属性編集
年齢、肌色、髪の長さ、性別を段階的に編集してみます。
%cd /content/matching-with-gans

ATTRS_TO_ALTER = 'ACHG'
!python ./projection_manipulation/scripts/02_manipulate.py  {PROJECTED_IMAGES_DIR} {MANIPULATED_IMAGES_DIR} {ATTRS_TO_ALTER}

Image.open(join(MANIPULATED_IMAGES_DIR, img1_wo_ext+"_01.png"))
出力結果は以下の通りです。
中間画像生成
最後に入力した2画像間の中間画像を生成してみます。
%cd /content/matching-with-gans

!python ./projection_manipulation/scripts/02_interpolate.py  {PROJECTED_IMAGES_DIR} {INTERPOLATED_IMAGES_DIR}

Image.open(join(INTERPOLATED_IMAGES_DIR, img2_wo_ext + "_01_" + img1_wo_ext +"_01.png"))
出力結果は以下の通りです。
非常に自然に段階的に変化していますね。
まとめ
本記事では、Matching in GAN-Spaceを用いて、顔写真の属性編集と、中間画像を生成する方法をご紹介しました。
GAN関連は出力結果が視覚的にはっきりとしているので、知的好奇心がそそられますね。
これを機に機械学習に興味を持つ方が一人でもいらっしゃいましたら幸いです。
また本記事では、機械学習を動かすことにフォーカスしてご紹介しました。
もう少し学術的に体系立てて学びたいという方には以下の書籍などがお勧めです。ぜひご一読下さい。
リンク
リンク
また動かせるだけから理解して応用できるエンジニアの足掛かりに下記のUdemyなどもお勧めです。
参考文献
1.
論文 - Matched sample selection with GANs for mitigating attribute confounding
2. GitHub - matching-with-gans


0 件のコメント :
コメントを投稿