本記事では、HairCLIPと呼ばれる機械学習手法を用いて、写真に写る人の髪型や髪色を変更する方法をご紹介します。
HairCLIP
概要
HairCLIPは、テキストや参照画像を入力に、画像中の髪型や髪色などのhair
attributesを編集するCLIPベースの髪編集フレームワークです。
髪編集を実現する多くの従来手法は、編集のため入力にマスク画像などが必要でした。
対して、HairCLIPでは、画像と自然言語の適切な組み合わせを予測するCLIPモデルを組み込むことにより、マスク画像など面倒な入力を必要とせず、テキストや参照画像から髪型や髪色を変更することが可能となっています。
詳細はこちらの論文をご参照ください。
本記事では上記手法を用いて、顔写真の髪型や髪色を変更していきます。
デモ(Colaboratory)
それでは、実際に動かしながら髪編集を行っていきます。
ソースコードは本記事にも記載していますが、下記のGitHubでも取得可能です。
GitHub - Colaboratory demo
また、下記から直接Google Colaboratoryで開くこともできます。

また、このデモはPythonで実装しています。
Pythonの実装に不安がある方、Pythonを使った機械学習について詳しく勉強したい方は、以下の書籍やオンライン講座などがおすすめです。
環境セットアップ
それではセットアップしていきます。
Colaboratoryを開いたら下記を設定しGPUを使用するようにしてください。
「ランタイムのタイプを変更」→「ハードウェアアクセラレータ」をGPUに変更
初めに、論文発表元のGithubからソースコードを取得します
%cd /content

!git clone https://github.com/wty-ustc/HairCLIP.git

!git clone https://github.com/omertov/encoder4editing.git
!wget https://github.com/ninja-build/ninja/releases/download/v1.8.2/ninja-linux.zip
!sudo unzip ninja-linux.zip -d /usr/local/bin/
!sudo update-alternatives --install /usr/bin/ninja ninja /usr/local/bin/ninja 1 --force
次にライブラリをインストールします。
%cd /content/HairCLIP

!pip install ftfy regex tqdm
!pip install git+https://github.com/openai/CLIP.git
!pip install tensorflow-io
!pip install --upgrade --no-cache-dir gdown
環境セットアップの最後にライブラリをインポートします。
%cd /content/encoder4editing

from utils.alignment import align_face
from models.psp import pSp


%cd /content/HairCLIP

import os
import gdown
from argparse import ArgumentParser

import sys
sys.path.append(".")
sys.path.append("..")
import tempfile
from argparse import Namespace

import dlib
import torch
import torchvision
from torchvision import transforms
from torch.utils.data import DataLoader
from tqdm import tqdm

import imageio
from IPython.display import HTML
from base64 import b64encode
import glob
import numpy as np
from PIL import Image
import random

from criteria.parse_related_loss import average_lab_color_loss


%cd /content/HairCLIP/mapper

from mapper.datasets.latents_dataset_inference import LatentsDatasetInference
from mapper.hairclip_mapper import HairCLIPMapper
以上で環境セットアップは完了です。
学習済みモデルのダウンロード
続いてgdownを用いてGoogle Driveから学習済みモデルをダウンロードします。
まず、invertのため、e4e_ffhq_encodeをダウンロードします。
%cd /content/HairCLIP

from pydrive.auth import GoogleAuth
from pydrive.drive import GoogleDrive
from google.colab import auth
from oauth2client.client import GoogleCredentials

download_with_pydrive = True

class Downloader(object):
    def __init__(self, use_pydrive):
        self.use_pydrive = use_pydrive
        current_directory = os.getcwd()
        self.save_dir = "/content/HairCLIP/pretrained_models"
        os.makedirs(self.save_dir, exist_ok=True)
        if self.use_pydrive:
            self.authenticate()

    def authenticate(self):
        auth.authenticate_user()
        gauth = GoogleAuth()
        gauth.credentials = GoogleCredentials.get_application_default()
        self.drive = GoogleDrive(gauth)

    def download_file(self, file_id, file_name):
        file_dst = f'{self.save_dir}/{file_name}'
        if os.path.exists(file_dst):
            print(f'{file_name} already exists!')
            return
        if self.use_pydrive:
            downloaded = self.drive.CreateFile({'id':file_id})
            downloaded.FetchMetadata(fetch_all=True)
            downloaded.GetContentFile(file_dst)
        else:
            !gdown --id $file_id -O $file_dst

downloader = Downloader(download_with_pydrive)
downloader.download_file(file_id="1cUv_reLE6k3604or78EranS7XzuVMWeO", file_name="e4e_ffhq_encode.pt")
次に、残りのモデルもダウンロードします。
%cd /content/HairCLIP

if not os.path.exists("./pretrained_models/hairclip.pt"):
  gdown.download('https://drive.google.com/uc?id=1hqZT6ZMldhX3M_x378Sm4Z2HMYr-UwQ4', "./pretrained_models/hairclip.pt", quiet=False)
if not os.path.exists("./pretrained_models/stylegan2-ffhq-config-f.pt"):
  gdown.download('https://drive.google.com/uc?id=1pts5tkfAcWrg4TpLDu6ILF5wHID32Nzm', "./pretrained_models/stylegan2-ffhq-config-f.pt", quiet=False)
if not os.path.exists("./pretrained_models/model_ir_se50.pth"):
  gdown.download('https://drive.google.com/uc?id=1FS2V756j-4kWduGxfir55cMni5mZvBTv', "./pretrained_models/model_ir_se50.pth", quiet=False)


# if not os.path.exists("./pretrained_models/test_faces.pt"):
#   gdown.download('https://drive.google.com/uc?id=1j7RIfmrCoisxx3t-r-KC02Qc8barBecr', "./pretrained_models/test_faces.pt", quiet=False)

if not os.path.exists("./pretrained_models/shape_predictor_68_face_landmarks.dat.bz2"):
  !wget -c http://dlib.net/files/shape_predictor_68_face_landmarks.dat.bz2 \
        -O ./pretrained_models/shape_predictor_68_face_landmarks.dat.bz2
  !bzip2 -dk ./pretrained_models/shape_predictor_68_face_landmarks.dat.bz2
テスト画像のダウンロード
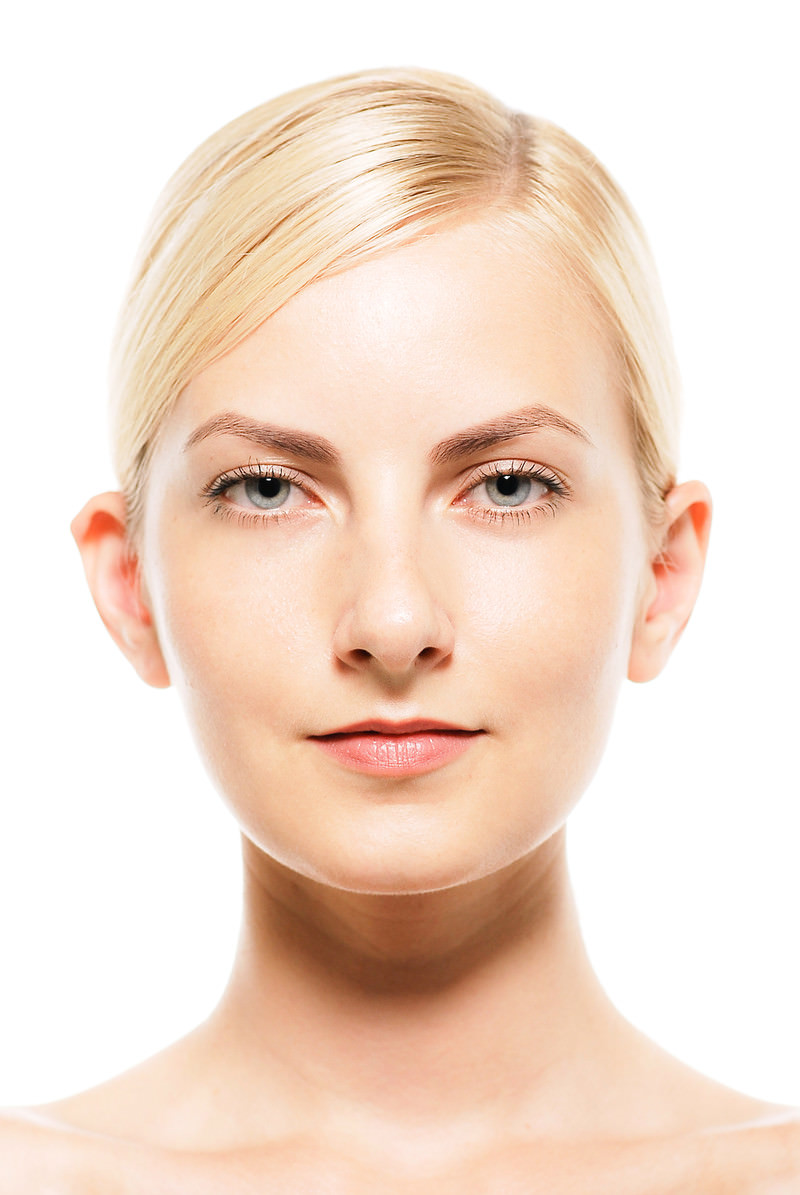
髪型を編集する画像をダウンロードします。
本記事ではこちらの画像を使用します。
%cd /content/HairCLIP
!mkdir demo

!wget -c https://www.pakutaso.com/shared/img/thumb/model10211041_TP_V4.jpg \
      -O ./demo/model10211041_TP_V4.jpg
hair editing
それでは、髪色や髪型などを編集していきます。
はじめに、髪色や髪型などをFormsから入力していきます。
%cd /content/HairCLIP

# @markdown 入力画像
image_path = "/content/HairCLIP/demo/model10211041_TP_V4.jpg" #@param {type:"string"}


# @markdown editing_type="both"でrandomに生成

# @markdown randomの場合下記の設定は反映されません。
IsRandom = True #@param {type:"boolean"}
random_num = 30 #@param {type:"integer"}

# @markdown randomではない場合は以下設定

# @markdown 編集タイプ colorのみ、styleのみ、両方
editing_type = "both" #@param["hairstyle", "color", "both"]
# @markdown 髪型選択
hairstyle_description = "crew cut hairstyle" #@param["afro hairstyle", "bob cut hairstyle", "bowl cut hairstyle", "braid hairstyle", "caesar cut hairstyle", "chignon hairstyle", "cornrows hairstyle", "crew cut hairstyle", "crown braid hairstyle", "curtained hair hairstyle", "dido flip hairstyle", "dreadlocks hairstyle", "extensions hairstyle", "fade hairstyle", "fauxhawk hairstyle", "finger waves hairstyle", "french braid hairstyle", "frosted tips hairstyle", "full crown hairstyle", "harvard clip hairstyle", "high and tight hairstyle", "hime cut hairstyle", "hi-top fade hairstyle","jewfro hairstyle", "jheri curl hairstyle", "liberty spikes hairstyle", "marcel waves hairstyle", "mohawk hairstyle", "pageboy hairstyle", "perm hairstyle", "pixie cut hairstyle", "psychobilly wedge hairstyle", "quiff hairstyle", "regular taper cut hairstyle", "ringlets hairstyle", "shingle bob hairstyle", "short hair hairstyle", "slicked-back hairstyle", "spiky hair hairstyle","surfer hair hairstyle", "taper cut hairstyle", "the rachel hairstyle", "undercut hairstyle", "updo hairstyle"]
# @markdown 髪色選択
color_description = "yellow" #@param["purple", "red", "orange", "yellow", "green", "blue", "gray", "brown", "black", "white", "blond", "pink"]

# 出力先ディレクトリ作成
!mkdir outputs
上記では、ランダムな髪型を30パターン出力するように設定しています。
特定の髪型を設定したい場合は、hairstyle_description、color_descriptionを指定してIsRandomをFalseに設定してください。
設定に基づき予測を実行します。
with open("/content/HairCLIP/mapper/hairstyle_list.txt") as infile:
  HAIRSTYLE_LIST = sorted([line.rstrip() for line in infile])
COLORSTYLE_LIST = ["purple", "red", "orange", "yellow", "green", "blue", "gray", "brown", "black", "white", "blond", "pink"]

device = "cuda:0"

# load e4e ffhq model
e4e_model_path = "/content/HairCLIP/pretrained_models/e4e_ffhq_encode.pt"
e4e_ckpt = torch.load(e4e_model_path, map_location="cpu")
e4e_opts = e4e_ckpt["opts"]
e4e_opts["checkpoint_path"] = e4e_model_path
e4e_opts = Namespace(**e4e_opts)

e4e_net = pSp(e4e_opts)
e4e_net.eval()
e4e_net.cuda()
print("e4e model successfully loaded!")

# set transforms
img_transforms = transforms.Compose(
    [
     transforms.Resize((256, 256)),
     transforms.ToTensor(),
     transforms.Normalize([0.5, 0.5, 0.5], [0.5, 0.5, 0.5]),
    ])

# load hairclip model
checkpoint_path = "/content/HairCLIP/pretrained_models/hairclip.pt"
ckpt = torch.load(checkpoint_path, map_location="cpu")

if IsRandom == True:
  for i in range(random_num):
    hairstyle_index = random.randrange(0, (len(HAIRSTYLE_LIST)-1), 1)
    colorstyle_index = random.randrange(0, (len(COLORSTYLE_LIST)-1), 1)
    predict(
        "both", HAIRSTYLE_LIST[hairstyle_index], COLORSTYLE_LIST[colorstyle_index],
        ckpt, image_path, img_transforms, device)

else:
  predict(
      editing_type, hairstyle_description, color_description,
      ckpt, image_path, img_transforms, device)
最後に、出力された画像を動画にまとめ表示します。
def generate_mp4(out_name, images, kwargs):
  writer = imageio.get_writer(out_name + '.mp4', **kwargs)
  for image in images:
    writer.append_data(image)
  writer.close()

def show_mp4(filename, width):
  mp4 = open(filename + '.mp4', 'rb').read()
  data_url = "data:video/mp4;base64," + b64encode(mp4).decode()
  display(HTML("""
  <video width="%d" controls autoplay loop>
    <source src="%s" type="video/mp4">
  </video>
  """ % (width, data_url)))

res_list = glob.glob("/content/HairCLIP/outputs/*.png")
images = []
for img_path in res_list:
  images.append(np.array(Image.open(img_path)))

kwargs = {'fps': 2}

gif_path = os.path.join("/content/HairCLIP/outputs", "animation")
generate_mp4(gif_path, images, kwargs)
show_mp4(gif_path, width=514)
出力結果はアイキャッチにも使用していますが、以下の通りです。
その他入力画像を変えてみた結果は以下の通りです。
まとめ
本記事では、HairCLIPを用いた、髪色や髪型の編集方法をご紹介しました。
ご自身の髪型の参考にいかがでしょうか。
また本記事では、機械学習を動かすことにフォーカスしてご紹介しました。
もう少し学術的に体系立てて学びたいという方には以下の書籍などがお勧めです。ぜひご一読下さい。
リンク
リンク
また動かせるだけから理解して応用できるエンジニアの足掛かりに下記のUdemyなどもお勧めです。
参考文献
1.
論文 - HairCLIP: Design Your Hair by Text and Reference Image
2. GitHub - wty-ustc/HairCLIP


0 件のコメント :
コメントを投稿