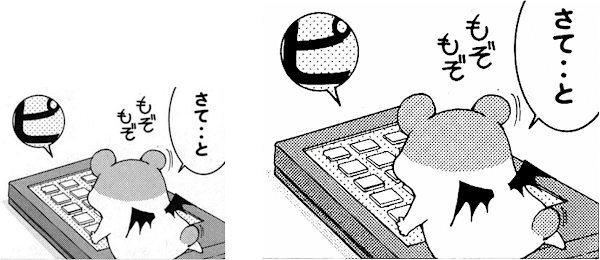
本記事では、漫画の超解像に特化した機械学習手法MangaRestorationを用いて超解像を行う方法をご紹介します。
MangaRestoration
概要
MangaRestorationは、劣化した低解像度のモノクロ漫画を復元する超解像技術です。
MangaRestorationは劣化したモノクロ漫画を復元するために以下の2段階の処理で構成されています。
1段階目では、Scale
Estimation
Network(SE-Net)を介して劣化した漫画画像から目標解像度を予測し、2段階目では、Manga
Restoration
Network(MR-Net)を使用して、領域ごとのモノクロスクリーントーンを区別して修復しています。
結果、本手法は他の超解像手法と比較してスクリーントーンの復元に優れた結果を示しています。
詳細はこちらの論文をご参照ください。
本記事では上記手法を用いて、モノクロ漫画を超解像していきます。
デモ(Colaboratory)
それでは、実際に動かしながらモノクロ漫画の超解像を行います。
ソースコードは本記事にも記載していますが、下記のGitHubでも取得可能です。
GitHub - Colaboratory demo
また、下記から直接Google Colaboratoryで開くこともできます。

なお、このデモはPythonで実装しています。
Pythonの実装に不安がある方、Pythonを使った機械学習について詳しく勉強したい方は、以下の書籍やオンライン講座などがおすすめです。
環境セットアップ
それではセットアップしていきます。
Colaboratoryを開いたら下記を設定しGPUを使用するようにしてください。
「ランタイムのタイプを変更」→「ハードウェアアクセラレータ」をGPUに変更
初めにGithubからソースコードを取得します。
%cd /content
!git clone https://github.com/msxie92/MangaRestoration.git
次にライブラリをインストールします。
%cd /content/MangaRestoration

!pip install --upgrade gdown
最後にライブラリをインポートします。
import os
import matplotlib.pyplot as plt
import cv2
以上で環境セットアップは完了です。
学習済みモデルのセットアップ
次に公開されている学習済みモデルをダウンロードします。
%cd /content/MangaRestoration
!mkdir -p release_model

if not os.path.exists('release_model/resattencv_manga_cons256.zip'):
  !gdown 'https://drive.google.com/uc?id=1sazt7jlvfR6KEjOp9Tq2GpjMe04uRgtn' \
    -O release_model/resattencv_manga_cons256.zip

!unzip release_model/resattencv_manga_cons256.zip -d release_model
テスト画像のセットアップ
次にモデルに入力する低解像度画像をダウンロードします。
%cd /content/MangaRestoration

!mkdir -p datazip/manga1/test flist/manga1

!wget -c https://github.com/msxie92/MangaRestoration/raw/main/examples/Akuhamu_020.jpg \
      -O datazip/manga1/test/test_01.jpg
!wget -c https://i.pinimg.com/736x/03/95/6b/03956bff323d9200a7e4d3b3020c5b58.jpg \
      -O datazip/manga1/test/test_02.jpg
2枚目の画像が大きいため縮小しておきます。
def imread(img_path):
  img = cv2.imread(img_path)
  img = cv2.cvtColor(img, cv2.COLOR_BGR2RGB)
  return img

img = imread('datazip/manga1/test/test_02.jpg')
dst = cv2.resize(img, dsize=None, fx=0.5, fy=0.5)
cv2.imwrite('datazip/manga1/test/test_02.jpg', dst)
最後に、入力画像のリストを生成しておきます。
!python scripts/flist.py \
  --path datazip/manga1/test \
  --output flist/manga1/test.flist
Manga Restoration
それでは、入力画像を超解像していきます。
!python testreal.py -c configs/manga.json -n resattencv -s 256
出力結果は以下の通りです。
in1 = 'datazip/manga1/test/test_01.jpg'
out1 = 'release_model/resattencv_manga_cons256/results_real_00400/test_01_pred.png'
in2 = 'datazip/manga1/test/test_02.jpg'
out2 = 'release_model/resattencv_manga_cons256/results_real_00400/test_02_pred.png'

fig = plt.figure(figsize=(20, 20))

ax1 = fig.add_subplot(2, 2, 1)
plt.title('test01 before', fontsize=16)
ax1.axis('off')

ax2 = fig.add_subplot(2, 2, 2)
plt.title('test01 after', fontsize=16)
ax2.axis('off')

ax3 = fig.add_subplot(2, 2, 3)
plt.title('test02 before', fontsize=16)
ax3.axis('off')

ax4 = fig.add_subplot(2, 2, 4)
plt.title('test02 after', fontsize=16)
ax4.axis('off')

ax1.imshow(imread(in1))
ax2.imshow(imread(out1))
ax3.imshow(imread(in2))
ax4.imshow(imread(out2))
SRCNN
別の超解像手法SRCNNと超解像結果を比較してみます。
%cd /content

!git clone https://github.com/Mirwaisse/SRCNN.git
!curl https://raw.githubusercontent.com/chigozienri/SRCNN/master/models/model_4x.pth -o model_4x.pth

%cd /content/SRCNN
!cp /content/MangaRestoration/datazip/manga1/test/test_01.jpg test_01.jpg

!python run.py \
  --zoom_factor 4 \
  --model /content/model_4x.pth \
  --image test_01.jpg \
  --cuda

in1 = '/content/MangaRestoration/datazip/manga1/test/test_01.jpg'
out1 = '/content/MangaRestoration/release_model/resattencv_manga_cons256/results_real_00400/test_01_pred.png'
out2 = '/content/SRCNN/zoomed_test_01.jpg'

fig = plt.figure(figsize=(30, 10))

ax1 = fig.add_subplot(1, 3, 1)
plt.title('test01', fontsize=16)
ax1.axis('off')

ax2 = fig.add_subplot(1, 3, 2)
plt.title('MangaRestoration', fontsize=16)
ax2.axis('off')

ax3 = fig.add_subplot(1, 3, 3)
plt.title('SRCNN', fontsize=16)
ax3.axis('off')

ax1.imshow(imread(in1))
ax2.imshow(imread(out1))
ax3.imshow(imread(out2))
MangaRestorationの方が、頭の部分のトーンがやや鮮明に超解像されている印象です。
まとめ
本記事では、MangaRestorationを用いて超解像を行う方法をご紹介しました。
論文に漫画がたくさん載っている様子が不思議な感覚です。
また本記事では、機械学習を動かすことにフォーカスしてご紹介しました。
もう少し学術的に体系立てて学びたいという方には以下の書籍などがお勧めです。ぜひご一読下さい。
リンク
リンク
また動かせるだけから理解して応用できるエンジニアの足掛かりに下記のUdemyなどもお勧めです。
参考文献
1. 論文 - Exploiting Aliasing for Manga Restoration
2. GitHub - msxie92/MangaRestoration


0 件のコメント :
コメントを投稿