本記事では、Bringing-Old-Photos-Back-to-Lifeと呼ばれる機械学習手法を用いて、折れ皺などを除去し古い写真を復元する方法をご紹介します。
Bringing-Old-Photos-Back-to-Life
概要
Bringing-Old-Photos-Back-to-Lifeは、Microsoft社が発表した劣化が激しい古い写真を復元するold photos restorationタスクを実現するディープラーニング手法です。
Bringing-Old-Photos-Back-to-Lifeは2つのVariational Autoencoders(VAEs)で構成されています。この2つのVAEをトレーニングして、古い写真ときれいな写真をそれぞれ2つの潜在空間に変換します。そして、2つの潜在空間の変換を合成画像の古い写真と、きれいな写真とのペアデータで学習します。
この構成では、古い写真と合成画像とのドメインギャップが、コンパクトな潜在空間で閉じられるため、実際の古い写真にうまく一般化されるというメリットが存在します。
結果この手法はold photos restorationタスクの視覚的品質の点でSOTAを達成しています。
詳細はこちらの論文をご参照ください。
本記事では上記手法を用いて、任意の古い写真を復元していきます。
デモ(Colaboratory)
それでは、実際に動かしながら劣化した古い写真を復元していきます。
ソースコードは本記事にも記載していますが、下記のGitHubでも取得可能です。
GitHub - Colaboratory demo
また、下記から直接Google Colaboratoryで開くこともできます。

なお、このデモはPythonで実装しています。
Pythonの実装に不安がある方、Pythonを使った機械学習について詳しく勉強したい方は、以下の書籍やオンライン講座などがおすすめです。
環境セットアップ
それではセットアップしていきます。
Colaboratoryを開いたら下記を設定しGPUを使用するようにしてください。
「ランタイムのタイプを変更」→「ハードウェアアクセラレータ」をGPUに変更
初めにGithubからソースコードを取得します。
!git clone https://github.com/microsoft/Bringing-Old-Photos-Back-to-Life.git photo_restoration

%cd /content/photo_restoration
# Commits on Jul 23, 2022使用
!git checkout 33875eccf4ebcd3665cf38cc56f3a0ce563d3a9c
次に依存するレポジトリをcloneします。
# Synchronized-BatchNormをクローン
%cd /content/photo_restoration/Face_Enhancement/models/networks
!git clone https://github.com/vacancy/Synchronized-BatchNorm-PyTorch
!cp -rf Synchronized-BatchNorm-PyTorch/sync_batchnorm .

%cd /content/photo_restoration/Global/detection_models
!git clone https://github.com/vacancy/Synchronized-BatchNorm-PyTorch
!cp -rf Synchronized-BatchNorm-PyTorch/sync_batchnorm .
次にライブラリをインストールします。
%cd /content/photo_restoration

!pip install -r requirements.txt
最後にライブラリをインポートします。
import os
import io
import IPython.display
import numpy as np
import PIL.Image
以上で環境セットアップは完了です。
学習済みモデルのセットアップ
続いて、論文発表元が公開する学習済みモデルをセットアップしていきます。
# download the landmark detection model
%cd /content/photo_restoration/Face_Detection/
!wget http://dlib.net/files/shape_predictor_68_face_landmarks.dat.bz2
!bzip2 -d shape_predictor_68_face_landmarks.dat.bz2

# download the pretrained model
%cd /content/photo_restoration/Face_Enhancement
!wget https://github.com/microsoft/Bringing-Old-Photos-Back-to-Life/releases/download/v1.0/face_checkpoints.zip
!unzip face_checkpoints.zip

%cd /content/photo_restoration/Global
!wget https://github.com/microsoft/Bringing-Old-Photos-Back-to-Life/releases/download/v1.0/global_checkpoints.zip
!unzip global_checkpoints.zip
あわせて、予測結果を描画する関数を定義しておきます。
def imshow(a, format='png', jpeg_fallback=True):
  a = np.asarray(a, dtype=np.uint8)
  data = io.BytesIO()
  PIL.Image.fromarray(a).save(data, format)
  im_data = data.getvalue()
  try:
    disp = IPython.display.display(IPython.display.Image(im_data))
  except IOError:
    if jpeg_fallback and format != 'jpeg':
      print(('Warning: image was too large to display in format "{}"; '
             'trying jpeg instead.').format(format))
      return imshow(a, format='jpeg')
    else:
      raise
  return disp

def make_grid(I1, I2, resize=True):
  I1 = np.asarray(I1)
  H, W = I1.shape[0], I1.shape[1]

  if I1.ndim >= 3:
    I2 = np.asarray(I2.resize((W,H)))
    I_combine = np.zeros((H,W*2,3))
    I_combine[:,:W,:] = I1[:,:,:3]
    I_combine[:,W:,:] = I2[:,:,:3]
  else:
    I2 = np.asarray(I2.resize((W,H)).convert('L'))
    I_combine = np.zeros((H,W*2))
    I_combine[:,:W] = I1[:,:]
    I_combine[:,W:] = I2[:,:]
  I_combine = PIL.Image.fromarray(np.uint8(I_combine))

  W_base = 600
  if resize:
    ratio = W_base / (W*2)
    H_new = int(H * ratio)
    I_combine = I_combine.resize((W_base, H_new), PIL.Image.LANCZOS)

  return I_combine
Old Photo Restoration
それでは、古い画像を復元していきます。
まずレポジトリに含まれているテスト画像を入力してみます。
%cd /content/photo_restoration/

input_folder = "test_images/old_w_scratch" # 入力画像ディレクトリ
output_folder = "test_output"    # 出力画像ディレクトリ

!mkdir {output_folder}

!python run.py \
  --input_folder {input_folder} \
  --output_folder {output_folder} \
  --GPU 0 \
  --with_scratch
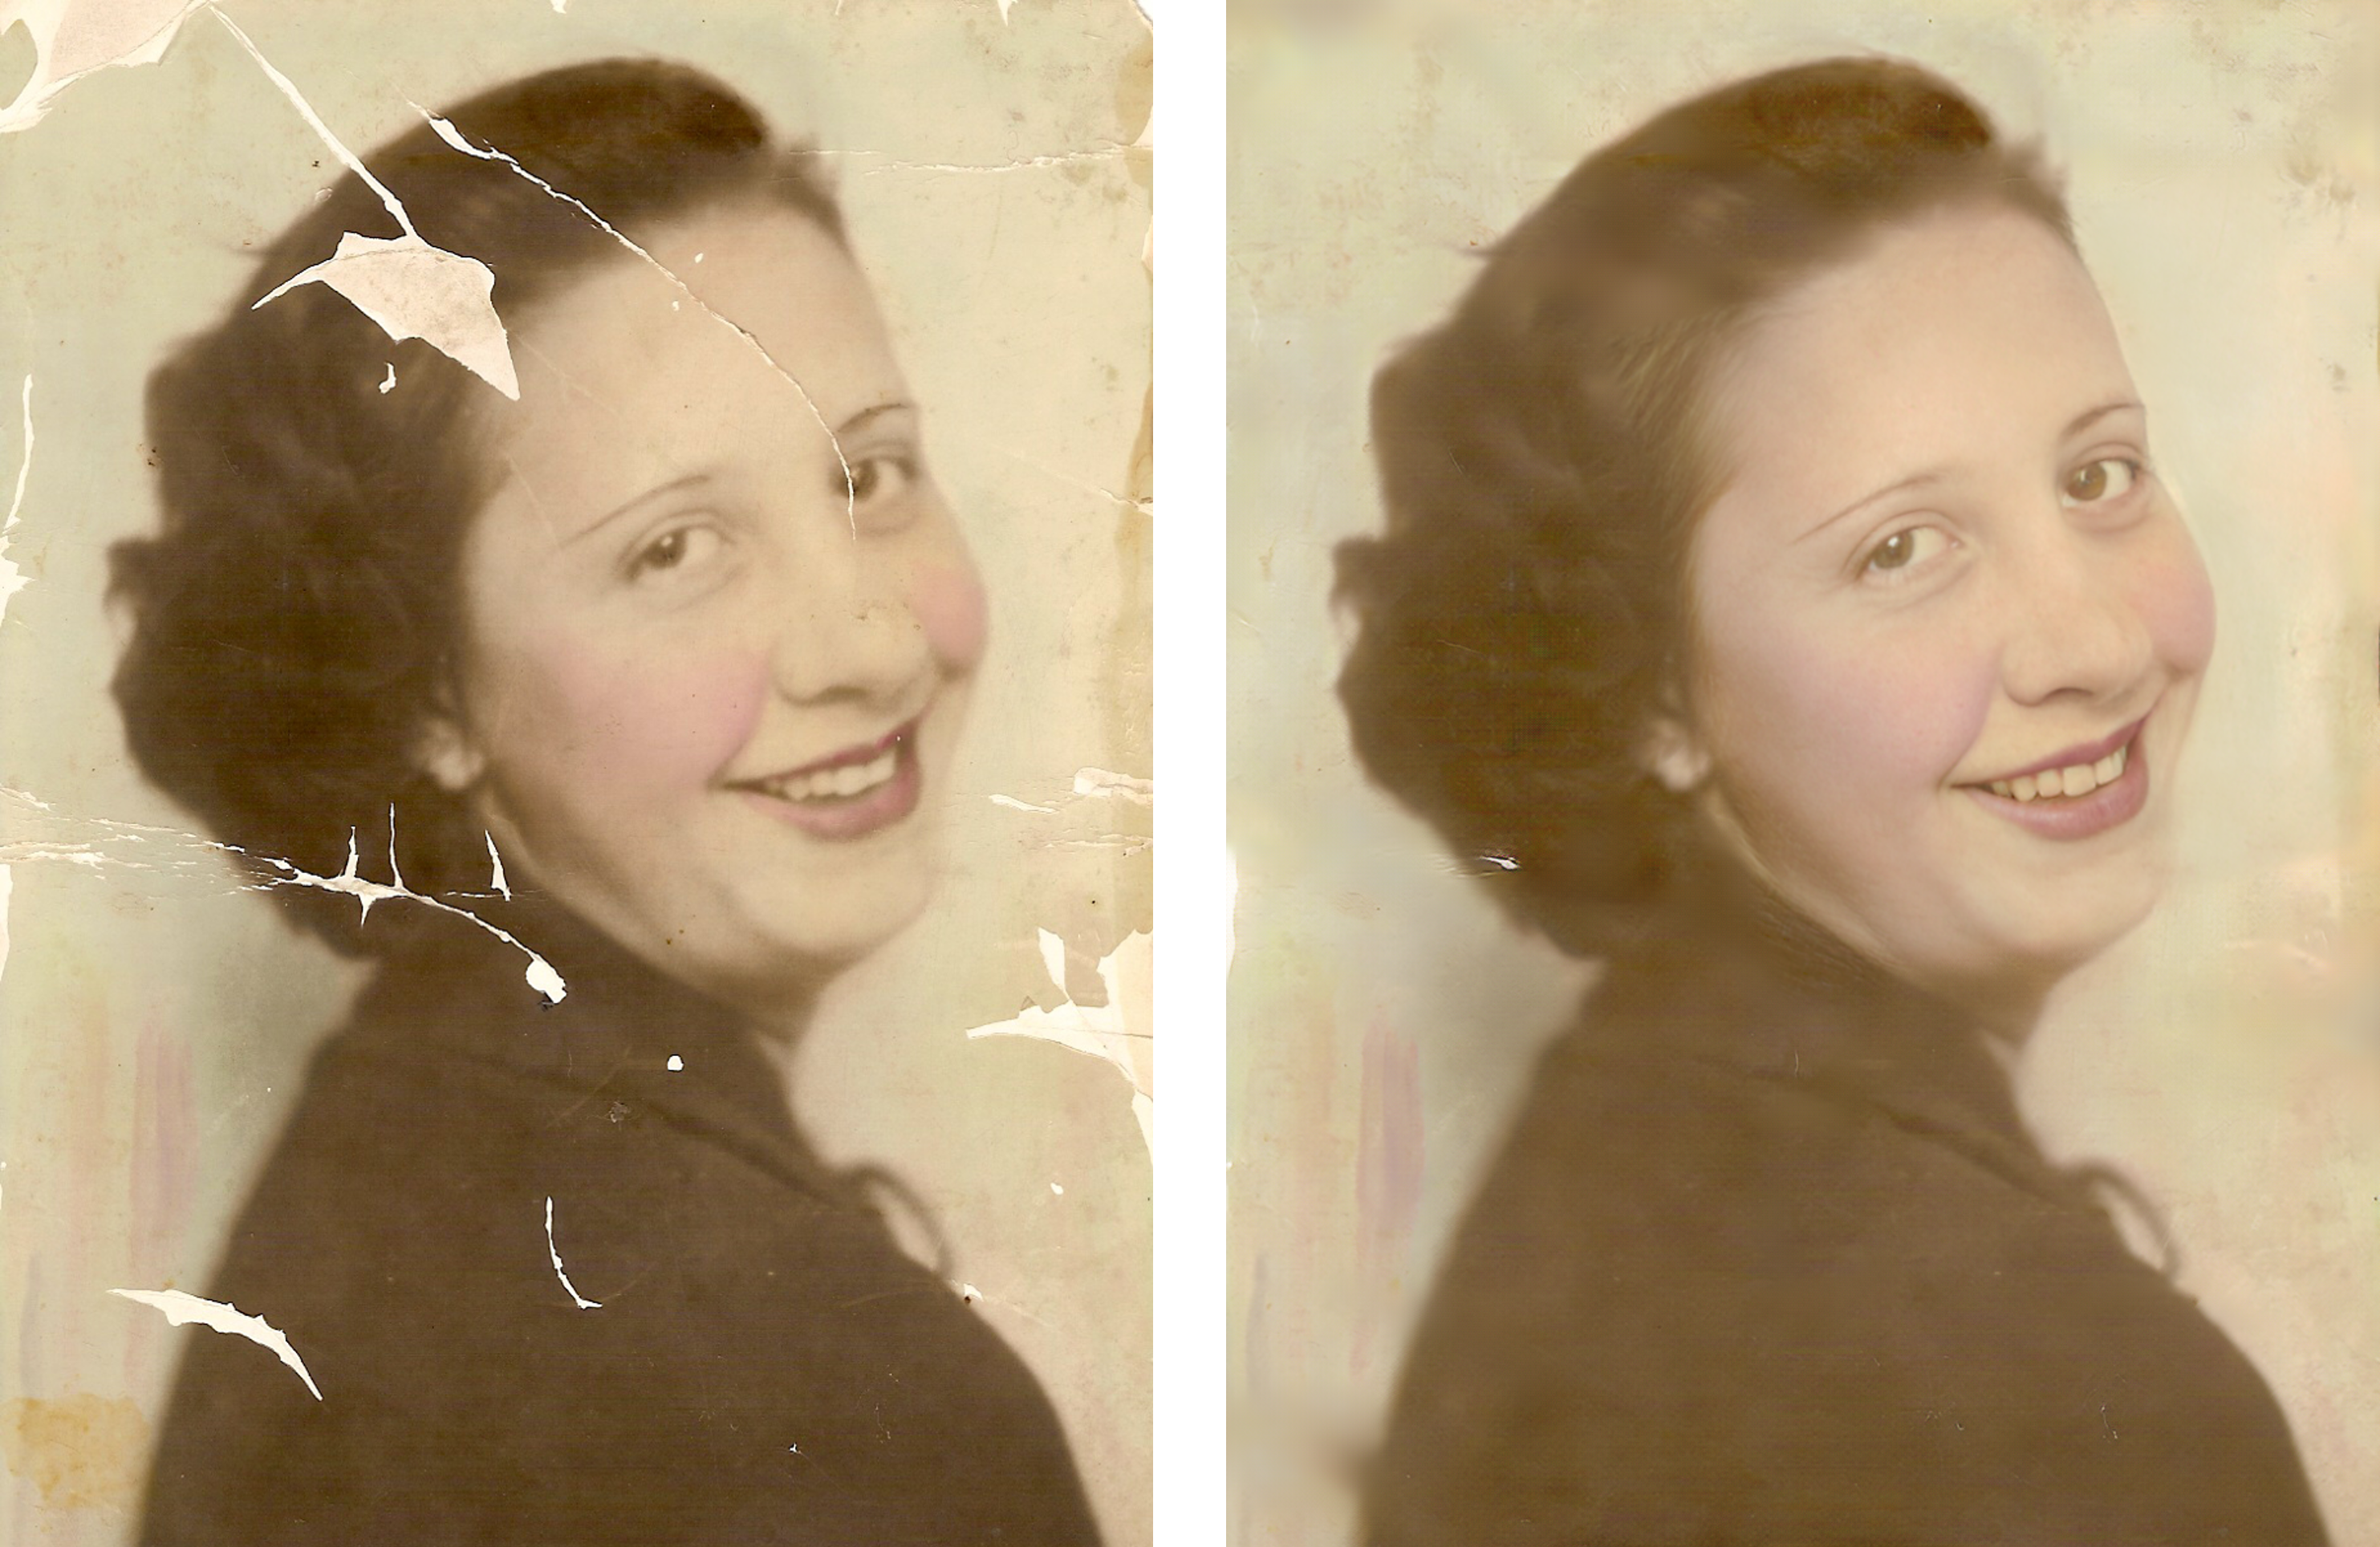
出力結果は以下の通りです。
filenames = os.listdir(os.path.join(input_folder))
filenames.sort()

for filename in filenames:
  print(filename)
  image_original = PIL.Image.open(os.path.join(input_folder, filename))
  image_restore = PIL.Image.open(os.path.join(output_folder, 'final_output', filename))

  display(make_grid(image_original, image_restore))
非常に高精度に写真の劣化部分を修正できています。
続いて、Web上から取得した任意の画像を入力してみます。
%cd /content/photo_restoration/

input_folder = "my_images/old_w_scratch" # 入力画像ディレクトリ
output_folder = "my_output"    # 出力画像ディレクトリ

!mkdir -p {input_folder}
!mkdir -p {output_folder}

!wget -c https://i.pinimg.com/236x/ec/ac/65/ecac654443b3d6d93733538f4a30045b--old-portraits-vintage-photographs.jpg \
      -O my_images/old_w_scratch/test_01.png

!wget -c https://cdn.cambridgeincolour.com/images/tutorials/dpr_localized1.jpg \
      -O my_images/old_w_scratch/test_02.png

!wget -c https://www.phowd.com/images/landing/old-photo-restored-repaired-before.jpg \
      -O my_images/old_w_scratch/test_03.png

!apt -y install imagemagick
!convert -geometry "50%" my_images/old_w_scratch/test_03.png my_images/old_w_scratch/test_03.png
先ほどと同様に、予測を実行します。
!python run.py \
  --input_folder {input_folder} \
  --output_folder {output_folder} \
  --GPU 0 \
  --with_scratch

filenames = os.listdir(os.path.join(input_folder))
filenames.sort()

for filename in filenames:
  print(filename)
  image_original = PIL.Image.open(os.path.join(input_folder, filename))
  image_restore = PIL.Image.open(os.path.join(output_folder, 'final_output', filename))

  display(make_grid(image_original, image_restore))
出力結果は以下の通りです。
任意の画像に対してもなかなかの精度です。論文通りモデルの一般化が上手くいっていると言えそうです。
まとめ
本記事では、Bringing-Old-Photos-Back-to-Lifeを用いて、劣化の激しい古い写真を復元してみました。
歴史的写真を復元することで新たな事実が発見できるかもしれませんね。
また本記事では、機械学習を動かすことにフォーカスしてご紹介しました。
もう少し学術的に体系立てて学びたいという方には以下の書籍などがお勧めです。ぜひご一読下さい。
リンク
リンク
また動かせるだけから理解して応用できるエンジニアの足掛かりに下記のUdemyなどもお勧めです。
参考文献
1.
論文 - Bringing Old Photos Back to Life
2. GitHub - microsoft/Bringing-Old-Photos-Back-to-Life


0 件のコメント :
コメントを投稿