本記事では、QR Code AI Art Generatorと呼ばれる機械学習手法を用いて任意のQRコードとテキストプロンプトから芸術的なQRコードを生成する方法をご紹介します。
QR Code AI Art Generator
概要
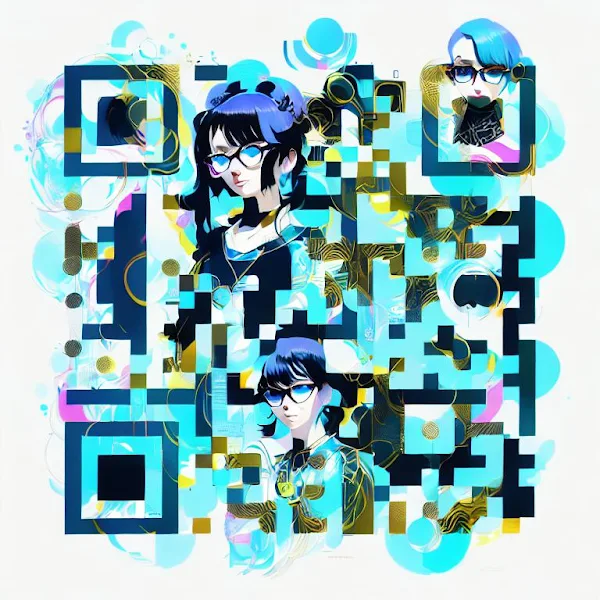
QR Code AI Art Generatorは、ControlNetをベースとして、QRコードとテキストプロンプトを入力に、テキストプロンプトの内容を反映したQRコードを生成する画像生成技術です。
本記事では上記手法を用いて、芸術的なQRコードを生成していきます。
デモ(Colaboratory)
それでは、実際に動かしながらQRコードを生成していきます。
ソースコードは本記事にも記載していますが、下記のGitHubでも取得可能です。
GitHub - Colaboratory demo
また、下記から直接Google Colaboratoryで開くこともできます。

なお、このデモはPythonで実装しています。
Pythonの実装に不安がある方、Pythonを使った機械学習について詳しく勉強したい方は、以下の書籍やオンライン講座などがおすすめです。
環境セットアップ
それではセットアップしていきます。
Colaboratoryを開いたら下記を設定しGPUを使用するようにしてください。
「ランタイムのタイプを変更」→「ハードウェアアクセラレータ」をGPUに変更
初めに生成するQRコードに含めたいURLなどを設定します。
# @markdown Initialize image
init_img_url = 'https://user0514.cdnw.net/shared/img/thumb/shikunDJI_0204_TP_V4.jpg?' #@param {type:"string"}
# @markdown Initialize image use or not
use_init_img = False #@param {type:"boolean"}
# @markdown URL for QR code
target_url = 'https://www.12-technology.com/' #@param {type:"string"}
# @markdown random seed
seed = 12 #@param {type:"integer"}
# @markdown text prompt
text_prompt = 'Sky view of highly aesthetic, ancient greek thermal baths  in beautiful nature' #@param {type:"string"}
# @markdown image size
img_size = 768 #@param {type:"integer"}
# @markdown output path
output_path = './result.jpg' #@param {type:"string"}
次にライブラリをインストールします。
%cd /content

!pip -q install diffusers transformers accelerate torch xformers
!pip install qrcode
最後にライブラリをインポートします。
%cd /content

import torch
from PIL import Image
import matplotlib.pyplot as plt
from diffusers import StableDiffusionControlNetImg2ImgPipeline, ControlNetModel, DDIMScheduler, DPMSolverMultistepScheduler
from diffusers.utils import load_image

import qrcode

device = 'cuda' if torch.cuda.is_available() else 'cpu'
print('using device is', device)
以上で環境セットアップは完了です。
学習済みモデルのセットアップ
次に、HuggingFaceから学習済みモデルをロードします。
controlnet_id = 'DionTimmer/controlnet_qrcode-control_v1p_sd15'
stable_diffusion_id = 'runwayml/stable-diffusion-v1-5'

controlnet = ControlNetModel.from_pretrained(
    controlnet_id,
    torch_dtype=torch.float16)

pipe = StableDiffusionControlNetImg2ImgPipeline.from_pretrained(
    stable_diffusion_id,
    controlnet=controlnet,
    safety_checker=None,
    torch_dtype=torch.float16
)

pipe.enable_xformers_memory_efficient_attention()
# pipe.scheduler = DDIMScheduler.from_config(pipe.scheduler.config)
pipe.scheduler = DPMSolverMultistepScheduler.from_config(pipe.scheduler.config, use_karras=True, algorithm_type="sde-dpmsolver++")
pipe.enable_model_cpu_offload()
QRコード画像生成
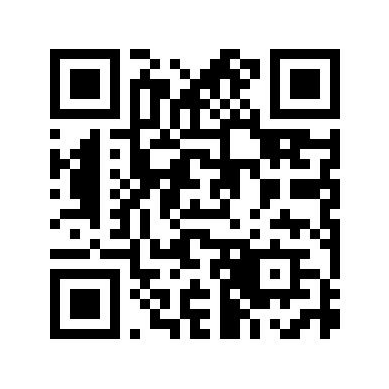
ここでは、先ほど設定したURLからQRコード画像を生成します。
生成した画像は、ControlNetの制御用入力画像として使用されます。
img = qrcode.make(target_url)
img.convert("RGB").save(qr_img_path)

plt.imshow(plt.imread(qr_img_path))
plt.axis('off')
plt.show()
こちらのQRコード画像を使用します。
QR code AI Art
それでは、テキストプロンプトとQRコード画像から新たな芸術的なQRコードを生成します。
まず、リサイズ用関数を定義します。
def resize_for_condition_image(input_image: Image, resolution: int):
  input_image = input_image.convert("RGB")
  W, H = input_image.size
  k = float(resolution) / min(H, W)
  H *= k
  W *= k
  H = int(round(H / 64.0)) * 64
  W = int(round(W / 64.0)) * 64
  img = input_image.resize((W, H), resample=Image.LANCZOS)
  return img
サンプリングを実行します。
# qr code image
source_image = load_image(qr_img_path)
condition_image = resize_for_condition_image(source_image, img_size)

image = condition_image

generator = torch.manual_seed(seed)

image = pipe(
    prompt                            = text_prompt,
    negative_prompt                   = "ugly, disfigured, low quality, blurry, nsfw",
    image                             = image,
    control_image                     = condition_image,
    width                             = img_size,
    height                            = img_size,
    guidance_scale                    = 7.5,
    controlnet_conditioning_scale     = 1.5,
    generator                         = generator,
    strength                          = 0.9,
    num_inference_steps               = 50
    )

image.images[0].save(output_path)

plt.imshow(plt.imread(output_path))
plt.axis('off')
plt.show()
出力結果は以下の通りです。
下図は、実際にQRコードとして読み取ることが可能です。
1点注意点として、今回のケースではうまく生成できていますが、テキストプロンプトとパラメータのバランス調整がやや難しくQRコードとして読み取れないケースも往々にして発生します。
以下は、エラーケースです。
まとめ
本記事では、QR Code AI Art Generatorを用いて芸術的なQRコードを生成する方法をご紹介しました。
一風変わったQRコードにより人の目を惹きますね。
また本記事では、機械学習を動かすことにフォーカスしてご紹介しました。
もう少し学術的に体系立てて学びたいという方には以下の書籍などがお勧めです。ぜひご一読下さい。
リンク
リンク
また動かせるだけから理解して応用できるエンジニアの足掛かりに下記のUdemyなどもお勧めです。
参考文献
1.
HuggingFace - DionTimmer/controlnet_qrcode-control_v1p_sd15


0 件のコメント :
コメントを投稿