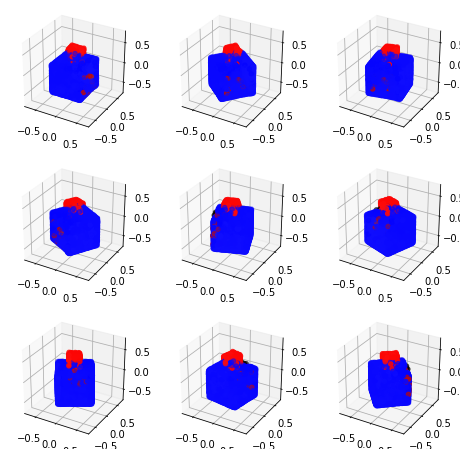
本記事では、Point-Eと呼ばれる機械学習手法を用いてテキストから3次元点群を生成する方法をご紹介します。
Point-E
概要
Point-Eは、OpenAIが発表した拡散モデルを用いた3次元点群生成技術です。
従来のテキスト条件付きの3次元オブジェクト生成技術(text-conditional 3D object generation)は、1つのサンプルを生成する際に複数のGPUを用いて多くの処理時間を要することが課題でした。
Point-Eでは、まずテキストから画像への拡散モデルを使用して、単一の合成ビューを生成し、次に生成された画像を使用し、2つ目の拡散モデルを使用して3次元点群を生成しています。
この構成はサンプルの品質ではSOTAを達成していませんが、従来技術と比較し、1~2桁高速であり、限定的なユースケースで実用的なトレードオフを提供すると示されています。
詳細はこちらの論文をご参照ください。
本記事では上記手法を用いて、テキストから3次元点群を生成します。
デモ(Colaboratory)
それでは、実際に動かしながらテキストから3次元点群を生成します。
ソースコードは本記事にも記載していますが、下記のGitHubでも取得可能です。
GitHub - Colaboratory demo
また、下記から直接Google Colaboratoryで開くこともできます。

なお、このデモはPythonで実装しています。
Pythonの実装に不安がある方、Pythonを使った機械学習について詳しく勉強したい方は、以下の書籍やオンライン講座などがおすすめです。
環境セットアップ
それではセットアップしていきます。
Colaboratoryを開いたら下記を設定しGPUを使用するようにしてください。
「ランタイムのタイプを変更」→「ハードウェアアクセラレータ」をGPUに変更
初めにGithubからソースコードを取得します。
%cd /content

!git clone https://github.com/openai/point-e.git

# using Commits on Dec 20, 2022
%cd /content/point-e
!git checkout fc8a607c08a3ea804cc82bf1ef8628f88a3a5d2f
次にライブラリをインストールします。
%cd /content/point-e

!pip install -e .
最後にライブラリをインポートします。
%cd /content/point-e

from PIL import Image
from tqdm.auto import tqdm
import plotly.graph_objects as go

import torch
device = 'cuda' if torch.cuda.is_available() else "cpu"
print("using device is", device)

# for avoiding module 'skimage' has no attribute 'measure'
import skimage.measure
skimage.measure.label

from point_e.diffusion.configs import DIFFUSION_CONFIGS, diffusion_from_config
from point_e.diffusion.sampler import PointCloudSampler
from point_e.models.download import load_checkpoint
from point_e.models.configs import MODEL_CONFIGS, model_from_config
from point_e.util.plotting import plot_point_cloud
from point_e.util.point_cloud import PointCloud
from point_e.util.pc_to_mesh import marching_cubes_mesh
以上で環境セットアップは完了です。
Image to PointCloud
学習済みモデルのセットアップ
続いて学習済みモデルをロードします。
まずはテキストではなく、画像から3次元点群を生成するモデルをロードします。
print('creating base model...')
base_name = 'base40M' # @param ["base40M", "base300M", "base1B"]
base_model = model_from_config(MODEL_CONFIGS[base_name], device)
base_model.eval()
base_diffusion = diffusion_from_config(DIFFUSION_CONFIGS[base_name])

print('creating upsample model...')
upsampler_model = model_from_config(MODEL_CONFIGS['upsample'], device)
upsampler_model.eval()
upsampler_diffusion = diffusion_from_config(DIFFUSION_CONFIGS['upsample'])

print('downloading base checkpoint...')
base_model.load_state_dict(load_checkpoint(base_name, device))

print('downloading upsampler checkpoint...')
upsampler_model.load_state_dict(load_checkpoint('upsample', device))

# build point cloud sampler
sampler = PointCloudSampler(
    device=device,
    models=[base_model, upsampler_model],
    diffusions=[base_diffusion, upsampler_diffusion],
    num_points=[1024, 4096 - 1024],
    aux_channels=['R', 'G', 'B'],
    guidance_scale=[3.0, 3.0],
)
テスト画像のセットアップ
続いてモデルに入力する画像をロードします。
# Load an image to condition on.
img = Image.open('/content/point-e/point_e/examples/example_data/cube_stack.jpg')
img
Inference
それでは、画像から3次元点群を生成します。
samples = None
for x in tqdm(sampler.sample_batch_progressive(batch_size=1, model_kwargs=dict(images=[img]))):
  samples = x

pc = sampler.output_to_point_clouds(samples)[0]
fig = plot_point_cloud(pc, grid_size=3, fixed_bounds=((-0.75, -0.75, -0.75),(0.75, 0.75, 0.75)))
出力結果は以下の通りです。
画像から生成された点群が3次元上にプロットされた結果が表示されます。
Text to PointCloud
それでは、本題のテキストから3次元点群を生成していきます。
先ほどと同様に学習済みモデルをロードしていきます。
学習済みモデルのセットアップ
print('creating base model...')
base_name = 'base40M-textvec'
base_model = model_from_config(MODEL_CONFIGS[base_name], device)
base_model.eval()
base_diffusion = diffusion_from_config(DIFFUSION_CONFIGS[base_name])

print('creating upsample model...')
upsampler_model = model_from_config(MODEL_CONFIGS['upsample'], device)
upsampler_model.eval()
upsampler_diffusion = diffusion_from_config(DIFFUSION_CONFIGS['upsample'])

print('downloading base checkpoint...')
base_model.load_state_dict(load_checkpoint(base_name, device))

print('downloading upsampler checkpoint...')
upsampler_model.load_state_dict(load_checkpoint('upsample', device))

sampler = PointCloudSampler(
  device=device,
  models=[base_model, upsampler_model],
  diffusions=[base_diffusion, upsampler_diffusion],
  num_points=[1024, 4096 - 1024],
  aux_channels=['R', 'G', 'B'],
  guidance_scale=[3.0, 0.0],
  model_kwargs_key_filter=('texts', ''), # Do not condition the upsampler at all
)
Inference
それではテキストから3次元点群を生成していきます。
# Set a prompt to condition on.
prompt = 'a blue bicycle' # @param {type:"string"}

# Produce a sample from the model.
samples = None
for x in tqdm(sampler.sample_batch_progressive(batch_size=1, model_kwargs=dict(texts=[prompt]))):
  samples = x

pc = sampler.output_to_point_clouds(samples)[0]
fig = plot_point_cloud(pc, grid_size=3, fixed_bounds=((-0.75, -0.75, -0.75),(0.75, 0.75, 0.75)))
出力結果は以下の通りです。
出力結果の表示
点群をPlotlyで表示してみます。
fig_plotly = go.Figure(
  data=[
    go.Scatter3d(
      x=pc.coords[:,0], y=pc.coords[:,1], z=pc.coords[:,2],
      mode='markers',
      marker=dict(
        size=2,
        color=['rgb({},{},{})'.format(r,g,b) for r,g,b in zip(pc.channels["R"], pc.channels["G"], pc.channels["B"])],
      )
    )
  ],
  layout=dict(
    scene=dict(
      xaxis=dict(visible=False),
      yaxis=dict(visible=False),
      zaxis=dict(visible=False)
    )
  ),
)

fig_plotly.show(renderer="colab")
出力結果は以下の通りです。
まとめ
本記事では、Point-Eを用いたImage to PointCloud, Text to PointCloudの方法をご紹介しました。
処理速度の速さからサービス適用時などに応答性の向上が見込めます。
また本記事では、機械学習を動かすことにフォーカスしてご紹介しました。
もう少し学術的に体系立てて学びたいという方には以下の書籍などがお勧めです。ぜひご一読下さい。
リンク
リンク
また動かせるだけから理解して応用できるエンジニアの足掛かりに下記のUdemyなどもお勧めです。
参考文献
1.
論文 - Point-E: A System for Generating 3D Point Clouds from Complex Prompts
2. GitHub - openai/point-e


0 件のコメント :
コメントを投稿